23 March 2021

Getting started with SwiftUI’s OutlineGroup


During WWDC 2020 Apple revealed the next iteration of the framework, which included improvements to lists, views, groups, grids and more. It also included two handy little components: OutlineGroup and DisclosureGroup.


OutlineGroup


The definition according to the Apple developer documentation is as follows:

“A structure that computes views and disclosure groups on demand from an underlying collection of tree-structured, identified data.”

That's a mouthful but let's break it down:

"A structure that computes views and disclosure groups on demand..."

OutlineGroup is meant to be used in Lists within SwiftUI, and as far as list items/rows/cells go you can configure it to have a disclosure indicator of some sorts. In the UIKit world, these would be found on UITableViewCell as AccessoryType and on UICollectionViewListCell as UICellAccessory


DisclosureGroup is a new type of view that allows for showing or hiding another view, based on the state of the disclosure control.

Simply put, this first portion of OutlineGroup's description means that it will create views comprising of disclosure groups, for the given data.

"...from an underlying collection of tree-structured, identified data."

The data that drives an OutlineGroup needs to conform to specific requirements:

  • Needs to be in a tree structure
  • It needs to be identifiable, thus conform to the Identifiable protocol

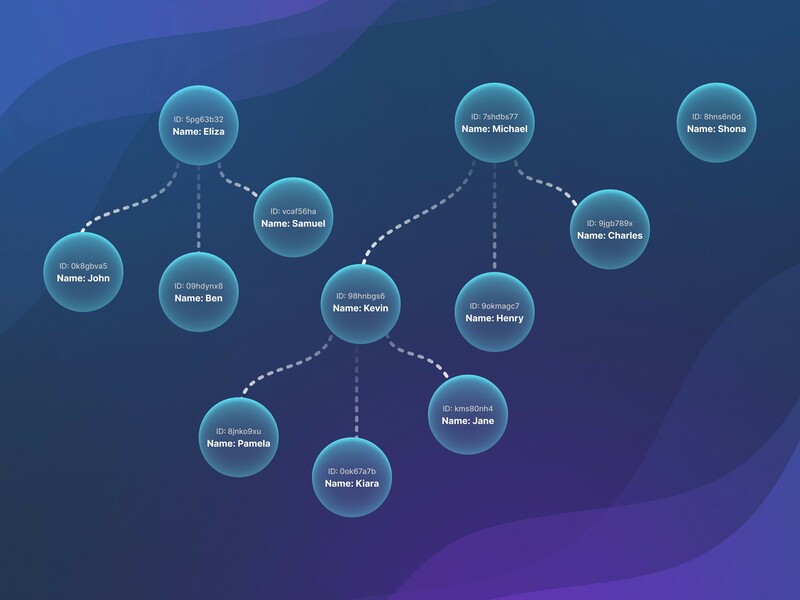
Let's build a structure of team members:

class TeamMember: Identifiable {
    let id = UUID()
    var name: String
    var image: String
    var reports: [TeamMember]?

    init(name: String, image: String = "person.circle", reports: [TeamMember]? = nil) {
        self.name = name
        self.image = image
        self.reports = reports
    }
}

Each TeamMember can have a list of direct reports, which is of the same type. Each TeamMember instance also conforms to Identifiable, allowing the OutlineGroup to compute the differential and layout correctly when needed.

Here's our team:

var engineeringTeam: [TeamMember] = [
    TeamMember(name: "Michael", reports: [
        TeamMember(name: "Kevin", reports: [
            TeamMember(name: "Pamela"),
            TeamMember(name: "Kiara"),
            TeamMember(name: "Jane"),
        ]),
        TeamMember(name: "Henry"),
        TeamMember(name: "Charles"),
        TeamMember(name: "Shona"),
    ]),
    TeamMember(name: "Eliza", reports: [
        TeamMember(name: "John"),
        TeamMember(name: "Ben"),
        TeamMember(name: "Samuel"),
    ]),
]


We can build out a fairly basic, but very functional view of this data using OutlineGroup. The key factors to making this work as mentioned are the tree structure, along with the identifiable data.

The initialiser for our OutlineGroup takes the following parameters:
  • The engineeringTeam data (tree structure)
  • A KeyPath to uniquely identify each item - we return the property implemented as part of the Identifiable protocol
  • A KeyPath to traverse the tree on - our tree is built on the reports property where each TeamMember could or could not have reports.

var body: some View {
    NavigationView {
        List {
            OutlineGroup(engineeringTeam, id: \.id, children: \.reports) { report in
                Text(report.name)
            }
        }
        .listStyle(GroupedListStyle())
        .navigationTitle("Team")
    }
}

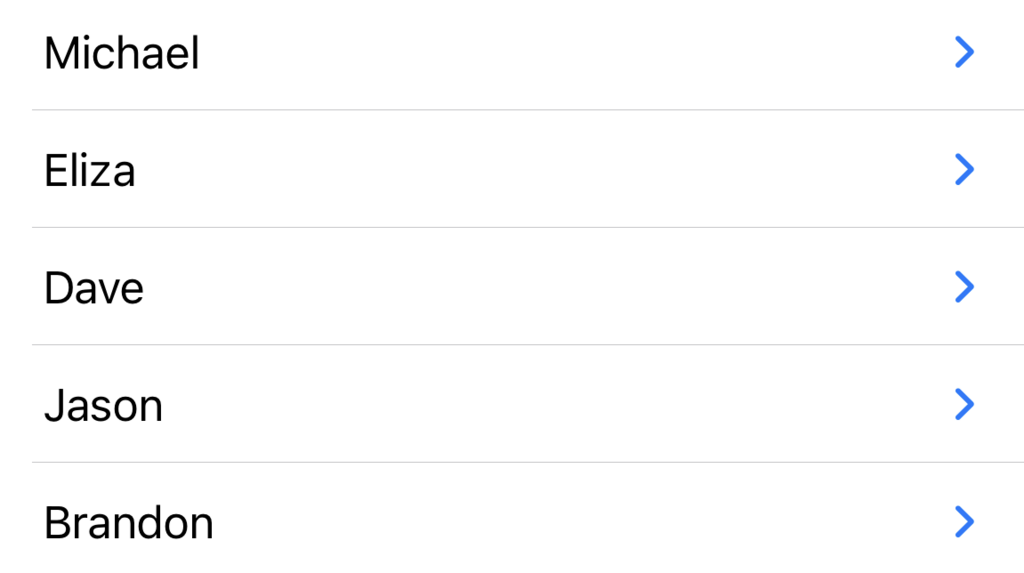
And here is what we end up with. That's a lot of useful functionality for a small amount of code:


Customisation


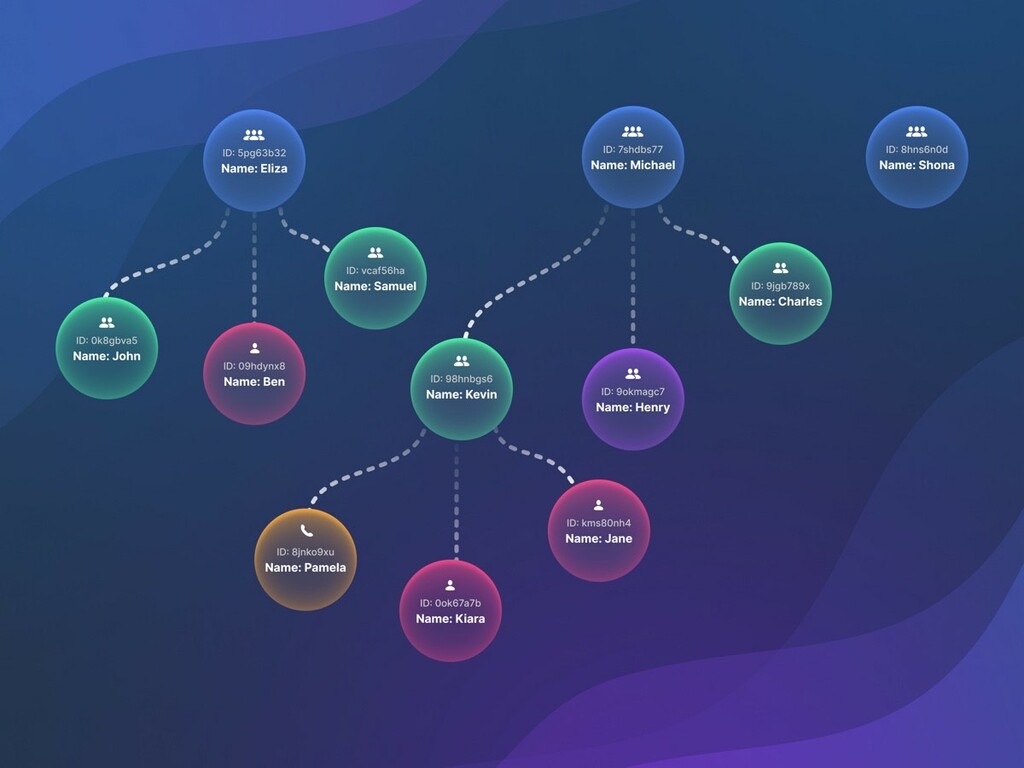
If you are building out something like a menu structure, or even a team as in this example, you might want to customise different levels of your hierarchy. To achieve this we can expand our data models to the following. We apply some sane defaults to our TeamMember object, while overriding where we want on the TeamLead and Manager levels.


class TeamMember: Identifiable {
    let id = UUID()
    private (set) var name: String
    private (set) var reports: [TeamMember]?
    private (set) var image: String
    private (set) var accentColor: Color

    init(name: String, image: String = "person.circle", accentColor: Color = .red, reports: [TeamMember]? = nil) {
        self.name = name
        self.image = image
        self.accentColor = accentColor
        self.reports = reports
    }
}

class TeamLead: TeamMember {
    override init(name: String,
                  image: String = "person.2.circle",
                  accentColor: Color = .green,
                  reports: [TeamMember]? = nil) {
        super.init(name: name, image: image, accentColor: accentColor, reports: reports)
    }
}

class Manager: TeamMember {
    override init(name: String,
                  image: String = "person.3",
                  accentColor: Color = .blue,
                  reports: [TeamMember]? = nil) {
        super.init(name: name, image: image, accentColor: accentColor, reports: reports)
    }
}

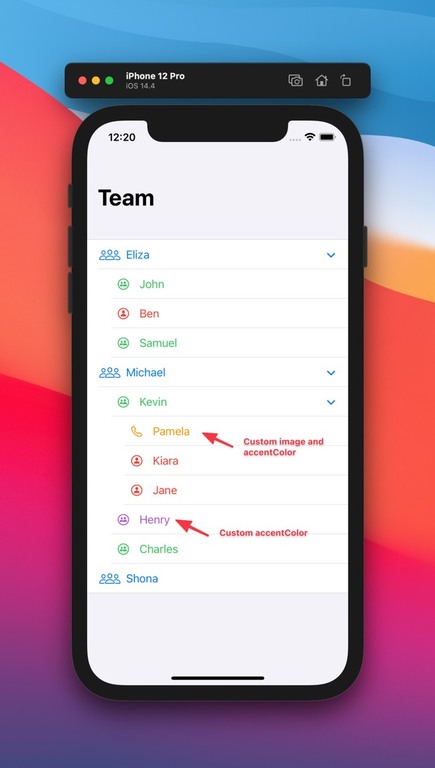
This inheritence structure will provide enough flexibility for the kinds of customisation we want to apply. By default our TeamMembers will be accented with red, TeamLeads with green, and Managers with blue. They'll each have their respective image applied too.

The updated List code now looks like this - we've substituted the Text for the new Label view, and applied a foreground modifier to it, which will use the accentColor property on the model:


var body: some View {
    NavigationView {
        List {
            OutlineGroup(engineeringTeam, id: \.id, children: \.reports) { report in
                Label(report.name, systemImage: report.image)
                    .foregroundColor(report.accentColor)
            }
        }
        .listStyle(GroupedListStyle())
        .navigationTitle("Team")
    }
}


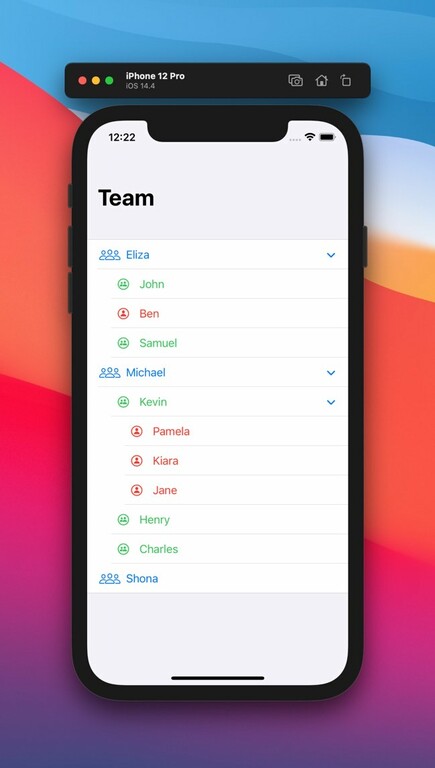
Without any further customisations, our default dataset yields the following:


We can further override individual objects through their initialiser, to get an added layer of customisation in the list. "Pamela" now has a custom image and accentColor, and "Henry" has a custom accentColor.


var engineeringTeam: [TeamMember] = [
    Manager(name: "Eliza", reports: [
        TeamLead(name: "John"),
        TeamMember(name: "Ben"),
        TeamLead(name: "Samuel"),
    ]),
    Manager(name: "Michael", reports: [
        TeamLead(name: "Kevin", reports: [
            TeamMember(name: "Pamela", image: "phone", accentColor: .orange),
            TeamMember(name: "Kiara"),
            TeamMember(name: "Jane"),
        ]),
        TeamLead(name: "Henry", accentColor: .purple),
        TeamLead(name: "Charles"),
    ]),
    Manager(name: "Shona"),
]


The results are as follows:


Lastly if you want to really break out of the mold, you can do a type check on the report object that is being iterated over, and return a completely different view depending on which object you're being handed:


var body: some View {
    NavigationView {
        List {
            OutlineGroup(engineeringTeam, id: \.id, children: \.reports) { report in
                // Manager
                if report is Manager {
                    Label(report.name, systemImage: report.image)
                        .font(.title)
                        .frame(height: 100)
                // TeamLead
                } else if report is TeamLead {
                    VStack(alignment: .leading) {
                        Text("TeamLead: \(report.name)")
                        Image(systemName: report.image)
                            .foregroundColor(report.accentColor)
                    }
                    .font(.title3)
                // TeamMember
                } else {
                    Label(report.name, systemImage: report.image)
                        .foregroundColor(report.accentColor)
                }
            }
        }
        .listStyle(GroupedListStyle())
        .navigationTitle("Team")
    }
}


Although this example seems a bit over the top, it helps illustrate how you can apply a range of customisations in your OutlineGroup. Not only have we applied a different view per object type, but we've also kept our customisations in the previous step for Pamela and Henry:


Summary


OutlineGroup is a special kind of control, but extremely powerful. Although it deals with a simple data structure such as a tree structure, it remains versatile when it comes to customisation and flexibility. Make sure to apply smart model design and a bit of generic view behaviour in your OutlineGroup, and you'll get stellar results.

Tell us about your project

We believe that something amazing can come from combining your vision with our expertise.

Let’s Chat
Join the team

Join the team and help create great apps with great people.

View Open Positions